From Sketch to Photoshop and into Dreamweaver.. |
| Things to consider: |
- Decide on screen resolution to design for - 800 x 600-px s(actual available space is slightly smaller to allow for browser chrome), or 1024 x 800px or a little less.
- Main info must (should) always be visible (top left quarantees visiblity.
- Try to keep to 3 screen ‘pages’ down scrolling - if more content, consider linking to a "next" page.
- Main menu links - position/color/effect should be consistent throughout the site
- No visual clutter!
|
| Layout of content.. |
 Start doodling with pencil and paper Start doodling with pencil and paper- Stay within a rough horizontal rectangular space
- “Wireframe” (visualize) the Home page - establish rough location of major elements: Logo, links, images, text.. etc.
|
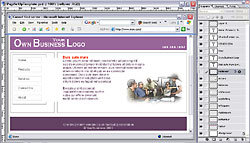
| From sketch to screen |
-
 Open up picture editor, and create a New Document Open up picture editor, and create a New Document
- Set image size to desired resolution size, 72-dpi, RGB color.
- Using your sketch as a guide, start to layout basic structures of page, using layers for each individual element
- Fill selections with color, and move layers around to establish rough locations of the individual elements
|
| Image editors: |
- PhotoShop ($645) (or Adobe Creative Suite)
- PS-Elements ($99)
- Illustrator ($499)
- Fireworks ($299)
- Corel Paint ($299)
- or any image editing software that allows text, blocks of color, lines etc. to be moved around. (Ideally supporting layers.) (Cheaper/older versions available.. also look for educational versions)
|
Save the page layout image in a "working" folder - seperate from the actual web files.
Isolate any parts of the design that will be optimised as images for the web (use slicing if posible, otherwise crop) and save for web:
- .gif (for flat colors) or
- .jpg (for anything with gradient colors)
- save them in a specified "images" folder in the root folder of the site.
- If using any patterend image for a background, make a .gif to be set to "tile". (Use caution.. keep tiled images very subtle!)
|
Before moving to the WYSIWYG editor, make some notes:
- Make notes of exact dimensions of the visual elements on the image. For instance: the size of a logo, the width of a menu bar, size of any images used, etc.
- Make notes of the "hexadecimal" values of colors uses. Colors for text, backgrounds, page background, individual areas, etc.
- Also plan roll-over dynamic effects for menu bars - text color, background colors, borders etc. for "on" and "over" states.
These measurements will be used in the page HTML and may be used for CSS divs and other CSS elements. |
Setting up the site files:
On your local drive, establish a "root" folder, with an "images" folder.
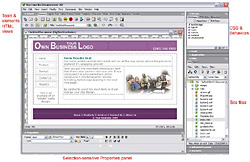 Open the WYSIWYG editor (DreamWeaver is used in the examples) and establish a site definition using the prepared site root folder. Open the WYSIWYG editor (DreamWeaver is used in the examples) and establish a site definition using the prepared site root folder.
|
| The next step is to start constructing the first page using the design established in the image file. (Tip: make a printout of the design, and add the measuremnts and notes - use that as a reference when building the page.) |
Decide whether to use a table based layout, a pure CSS layout or a combination of both. (Combination is a good compromise!)
Decide whether certain global elements such as the top header and/or a menu bar can be set as a "server side include". |
| DreamWeaver tutorial coming soon.. |